
Let’s Go Fishing
Remember a couple of weeks ago when I posted about some “secret” activities going on in the backyard. Well, we’ve got a couple of things finished.
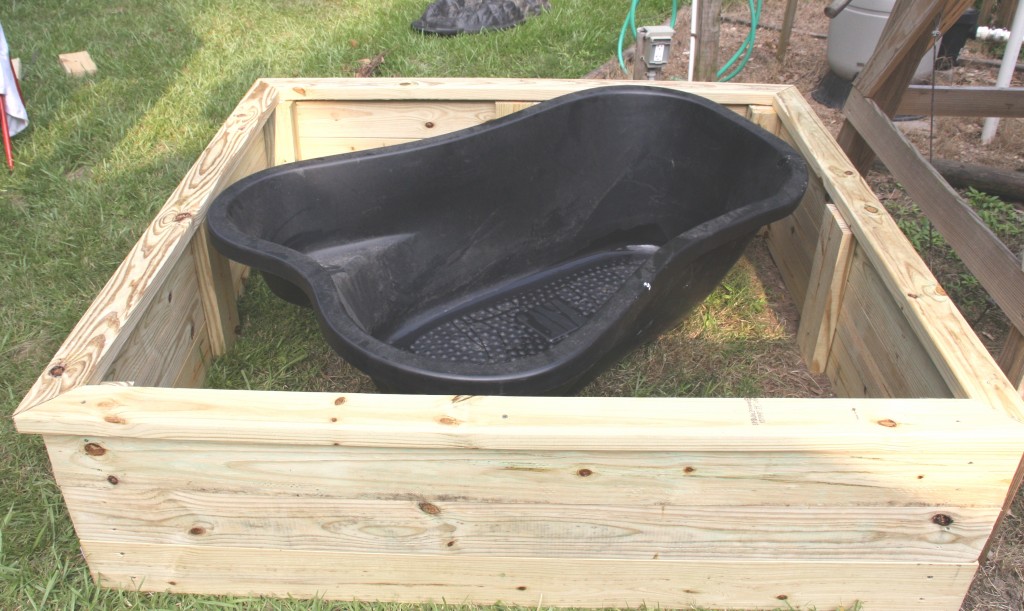
We built a pond box. What’s a pond box you ask? Well, it’s a box for a pond.
I bought this pond, complete with pump and all accessories (including a spitting frog), four or so years ago at a garage sale for $30. It has been sitting out in the shed ever since. Every once in a while it would call out to me but I just couldn’t decided where to put it and I really didn’t want to dig that big ol’ hole.
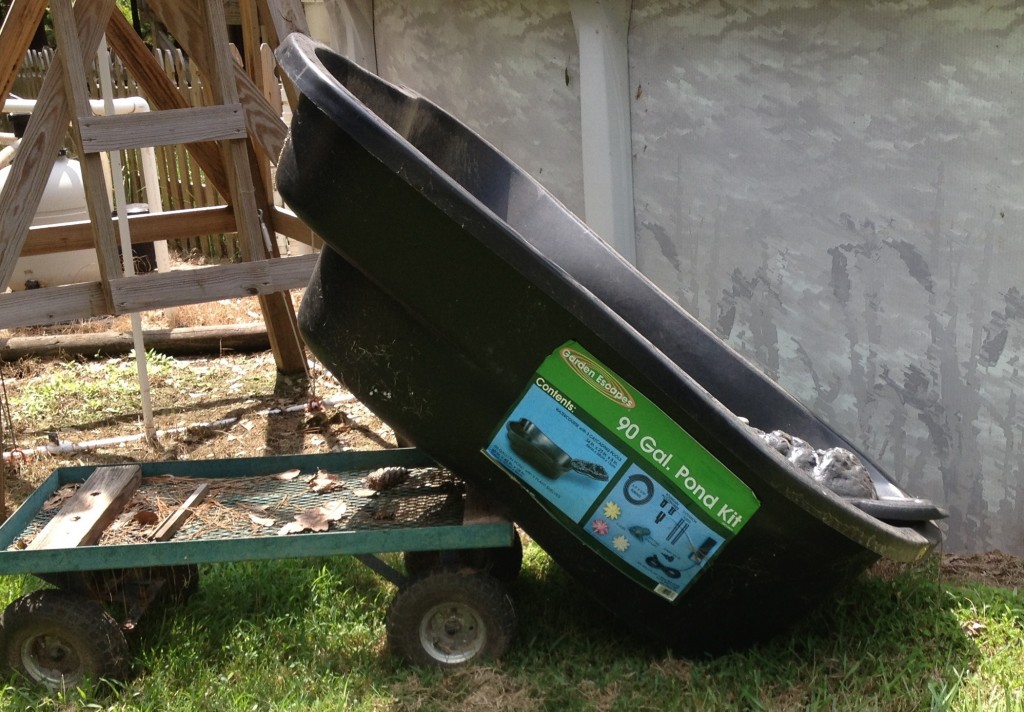
With all the new projects going on in the backyard, I finally found the perfect place for the pond BUT I still had no desire to dig this big ol’ hole (well, to be honest – I didn’t want Don to have to dig that big ol’ hole). We came up with the perfect solution – we’d build a box for our pond – there you have it – a pond box.
It really was pretty easy to build. Here’s what we did:
- Determine location of your pond box – Location – Location – Location
- Decided how big you want your box to be. Length, Width & Height. Of course we wanted the box to be big enough for the pond but not too much bigger because we would have a lot to fill with dirt.
- We made our box 5′ X 5.5′. It had to fit between the windmill and the dining deck and still have room to walk in between them.
- Lumber needed – Quantity needed will be determined by the size of your pond box.
- Treated 2 X 6
- Treated 4 X 4
- Treated 2 X 4 or 2X6 (depending on box and pond size)
- Tools needed
- Saw
- Ryobi Impact Driver or Drill – Highly recommend the Impact Driver
- Miter Saw
- Shovel
- Miscellaneous Items
- Speed Square
- Tape Measure
- Pencil
- Safety Glasses
- Deck Screws
- Tractor if you have a dirt pile in your backyard OR bags of dirt (enough to fill your box)
- Plants
- Fish
- Steps to build box
- Measure and cut your side boards (2’X6′)
- Measure and cut your 4’X4′ for your corner posts
- Measure and cut your middle supports (2’X6′)
- Let’s Build the Box
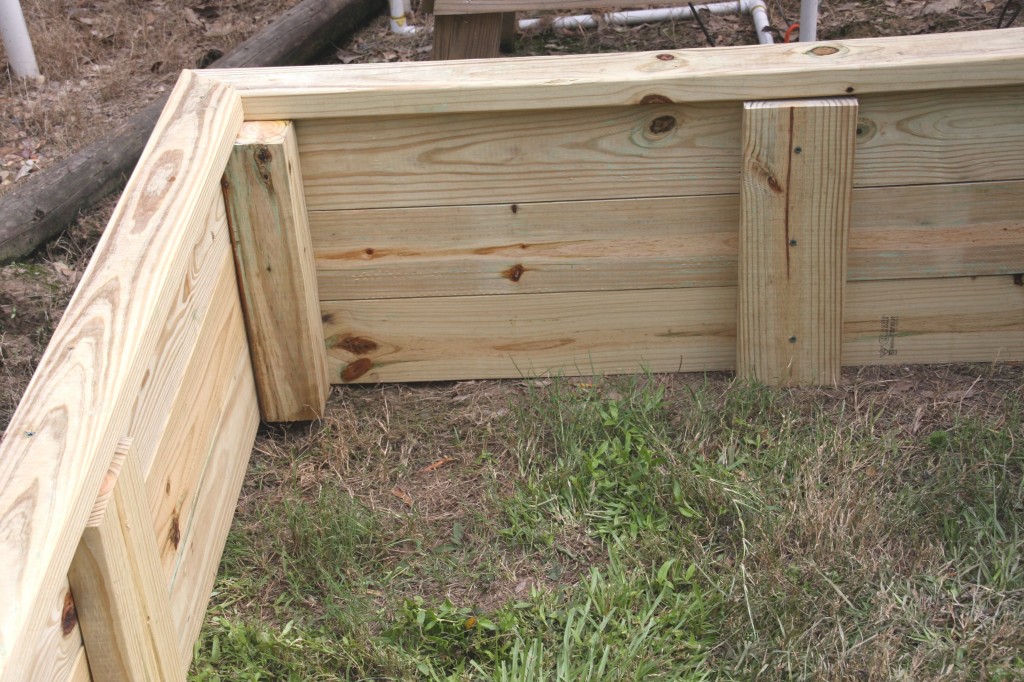
- Lay two – 4X4s down and place appropriate distance apart for the side you are working on. Screw your 2X6s into your 4X4s to build a wall. 2X6s need to be flush on the sides of your 4X4s.
- Continue until all four walls are completed and – Ta-Da – you have the beginning of a pond box.
- We then placed our box in it’s new home
- Install middle supports (inside of box)
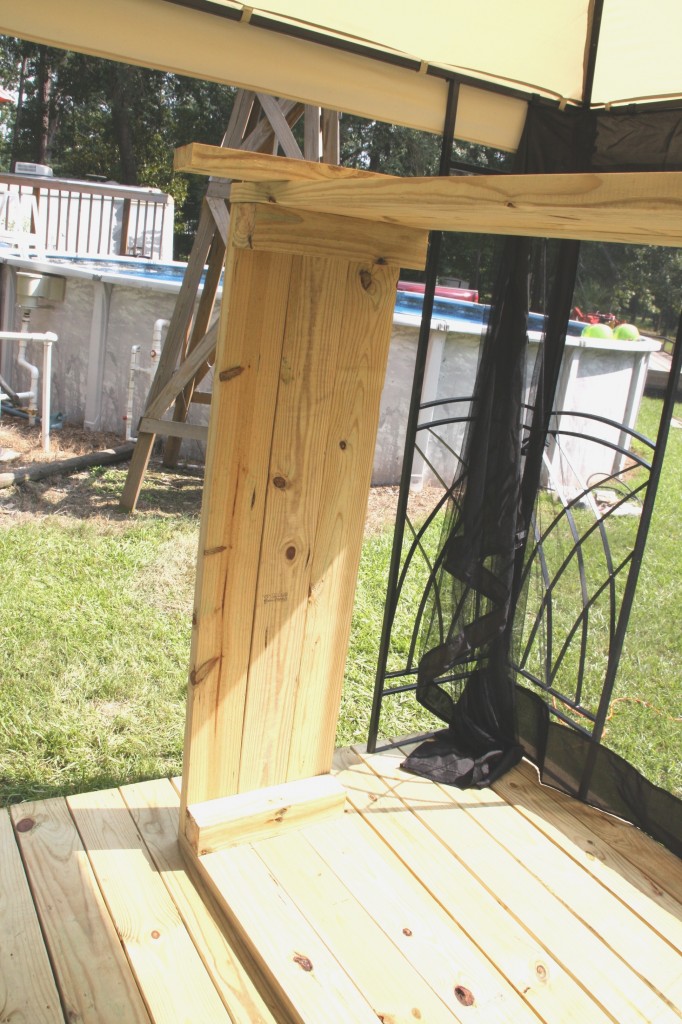
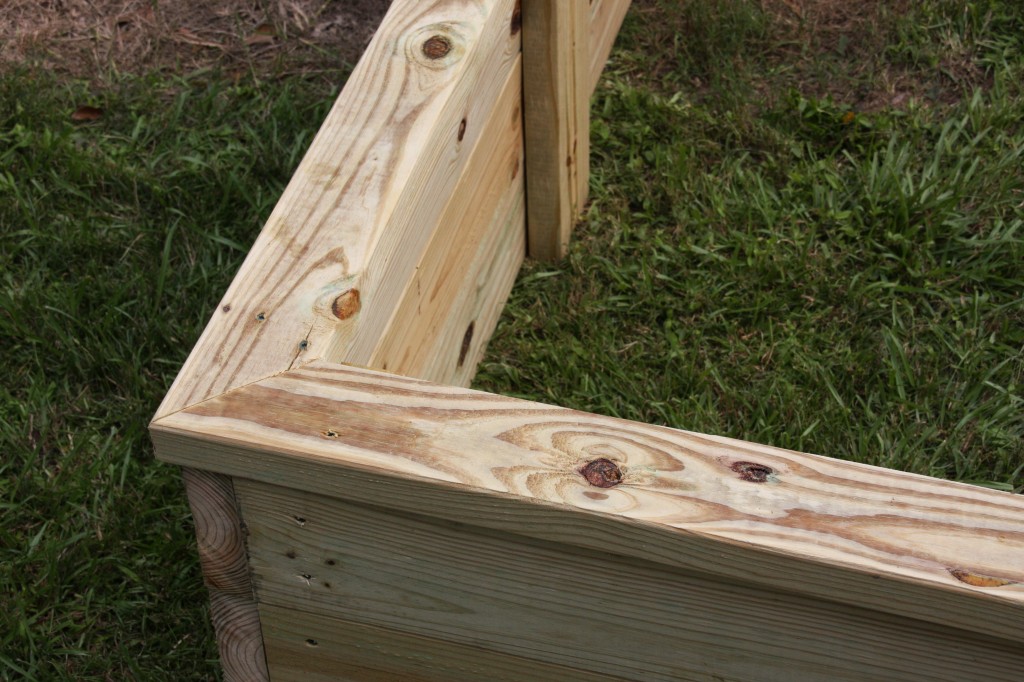
- Construct top rail. NOTE: Ideally you would want to use 2X6s for your top rail. This would completely hide your 4X4 corners. Due to the size of our pond and the desired location, we had to make our box a tad smaller than it should have been and we had to use 2X4s for our top rail. When you are determining size, remember that the 2X6 top rail will extend into the box by approximately 4″.
- Use your miter saw to cut 45 degree angles on all four top rails.
- Screw your top rails to the corner posts and middle supports. Make sure your miter corners match up.
- Make sure your box is exactly where you want your pond to be.
- Place pond exactly where you want it in the box. NOTE: In our picture, you will notice that the 4X4s and middle supports boards are showing. If you use the 2X6s they will not show.
- When you are sure this is where you want your box and your pond is where you want it in the box – Begin to fill box with dirt.
- Add water to the pond as you are adding dirt. This helps the pond stay straight and level.
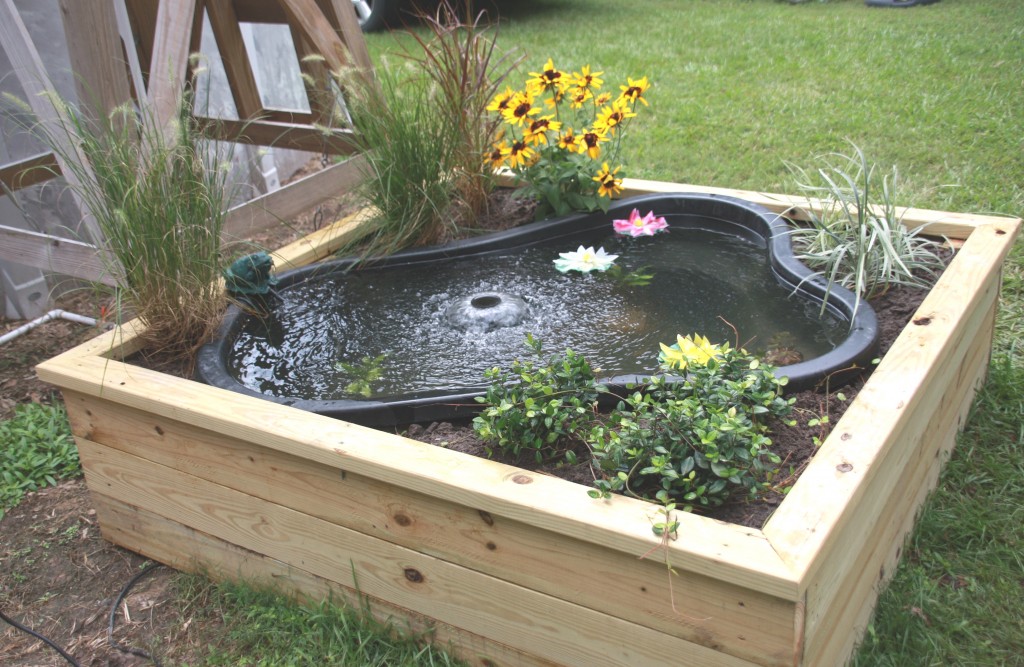
- Since we were adding landscaping to our pond box, we filled half the box with dirt from the back of our property (we live on acreage) and then filled the top half with top soil. Water the dirt to help it settle. The dirt needs to be packed to keep the integrity of the pond.
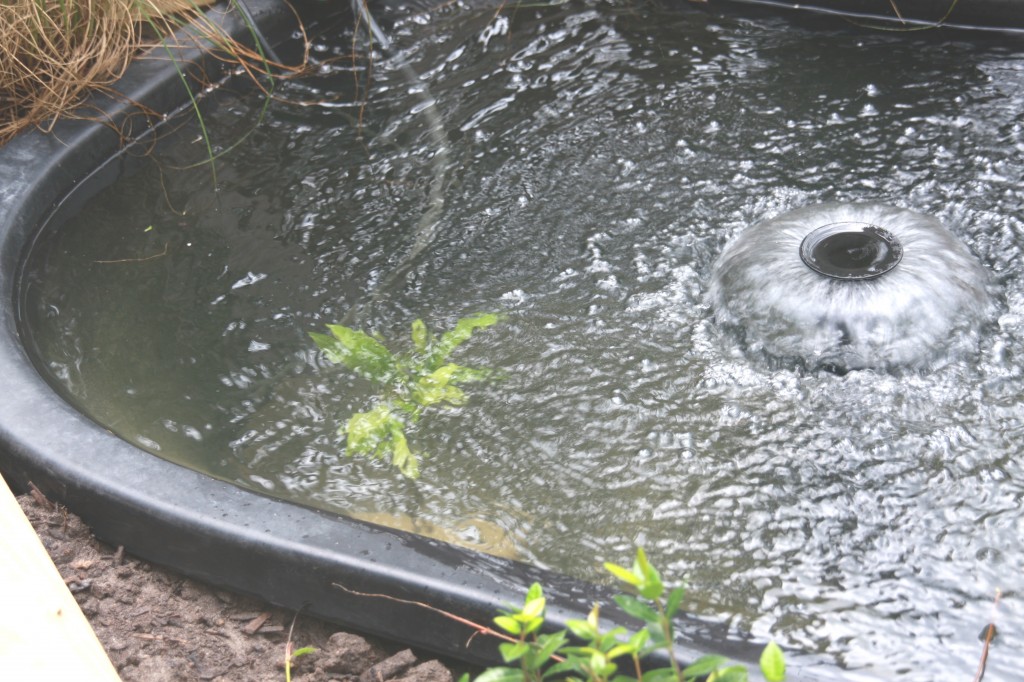
- We placed the pump and the spitting frog and filled the pond to desired level with water.
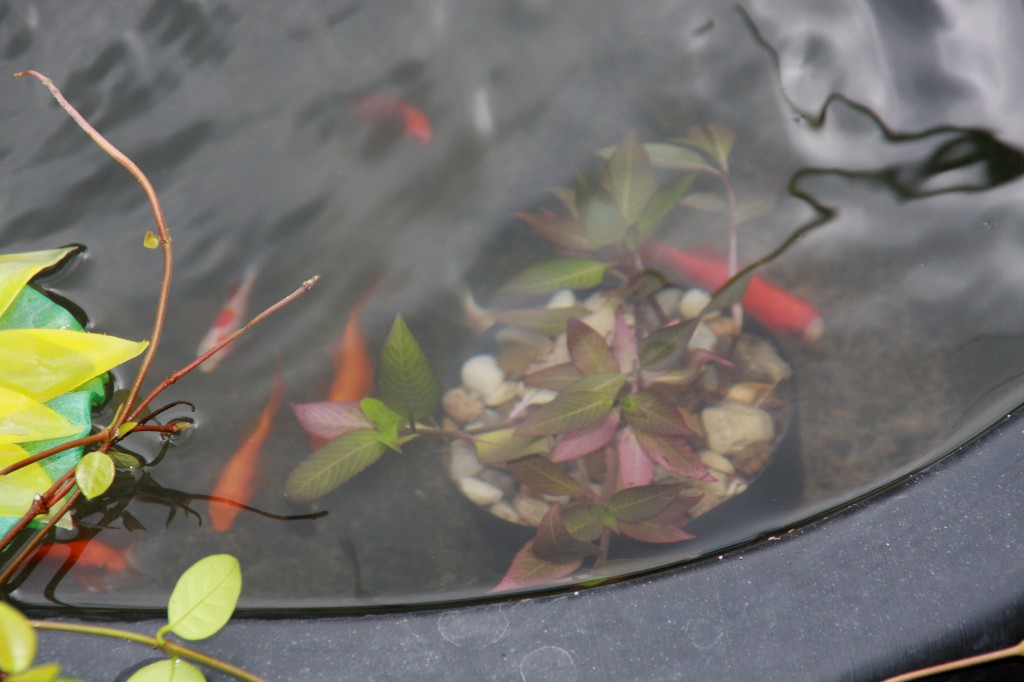
- The boys and I went to the pet shop and they decided we needed 13 goldfish. Make sure you let your fish acclimate before turning them loose in their new home. Benefits of adding fish: Fun and relaxing to watch AND Goldfish, Koi and Catfish control mosquitoes.
- Place pebbles on the bottom to create an area for microorganism to grow, creating a biological filter which helps the filter in keeping the water clean.
- Aquatic plants: Oxygenators (Cabomba & Anacharis) Submerged plants that provide oxygen for fish. Here’s how we planted our submerged plants:
- Tie submerged oxygenator plants together in bundles and wrap string around a brick and tie it to a plant bundle. Allow the brick to sink into the deepest area of the pond, away from any pumps or filters. Submerged plants do not need containers or soil.
- Plant marginal water plants in clay soil in shallow containers with pebbles on top and place on pond ledges or shelves. If your pond has no shelves, stack bricks on the bottom of the pond until you reach desired height.
LAST STEP: Add plants to complete the natural look and then enjoy your new pond. We love ours. It is so relaxing and just makes us smile.
Please Share


I am so amazed with this! I love water features and ponds are so fun! Nice job, excellent tutorial Tracey!!
Thank you Jillene. I have to go out there several times a day just to look at it because it makes me happy. I don’t know why. I’ve caught my husband doing the same thing.
I love how this turned out! It looks great! Wanna come to my house next?? 🙂
Just send me a ticket and I’ll be there.
I really like this a lot, Tracey! I love the idea of a raised backyard pond, but we can’t add fish to ours – the raccoons always eat them! 🙂
Looks good, About how many hours do y’all have in it?
It went really quick. I’m so glad you liked it.
This is amazing and it looks so great! What a great job!
Love it! I am so happy that you got a Ryobi Impact Driver. Ryobi
Rocks!
Keep up the building.
I’m just a building fool right now.
LOVE it, Tracey!! It looks fantastic!!